Saturday, April 30, 2011

Day 84

I had a busy little day doing household chores, going grocery shopping and doing my general domestic duties.  I had every intention of doing a regular craft today, but before that I had a hankering for chocolate chip pancakes.  I have actually been craving them for a while, but being vegan you can't just head over to Ihop for a stack!  I had some non-dairy vegan chocolate chips I had bought when I saw them on sale a while back and decided today was a good day to have pancakes for dinner.  When I finished cooking them I was so impressed with how nice they looked on the plate that I realized they were truly a work of art and could clearly pass for my craft today!!!  They looked like they belonged in a nice Veg magazine!  And let me just tell you, there were D E L I C I O U S!!!!  I ate slowly and made sure to say "MMMMMMM" after almost every bite!  Seriously, they were awesome!!!

I used Bob's Red Mill Organic 7 Grain Pancake Mix, using applesauce instead of the egg, I threw in the vegan chocolate chips into the batter and cooked those babies up!  Then I smothered them in Earth Balance butter and Blueberry Agave Nectar.  *sigh*  Sooooo good!!!

Here they are done, aren't they pretty!:


A closer view of the beautiful pancakes:


And even closer, admit it, your mouth is watering!:


Friday, April 29, 2011

Day 83

I have this really pretty peacock themed scrapbook and card stock paper that I wanted to use tonight but wasn't really sure how to.  I decided a mosaic style card might be a nice way to showcase the different papers.  I was trying to be precise about my cuts and then realized I wasn't getting anywhere trying to figure out measurements, so I just went for a haphazard approach, which when your crafting seems like a fantastic idea!

I picked a pretty blue card stock for the actual card, I then picked three different peacock themed card stock to go with it.  I cut each peacock paper into three strips and then each strip into squares.  I then applied each square to the blue card stock in a varied pattern.  It was really hard to photograph this when I was done because the paper is very shiny.  But here is what I came up with:

Done card:


Here are the  papers I used after I cut the peacock paper into strips:


Here is a close up of the finished card, trying to get a bit more detail:

Thursday, April 28, 2011

Day 82

The other day I was doing a search online for craft ideas and I came across a bookmark called "Honey Bunny" and I just knew I had to make it and who I had to make it for! 

My Ome (my mom's mother) calls me Honey Bunny, she has since I can remember, and still does, even though I'm in my 30's and honestly if she ever stopped, it would break my heart.  I couldn't believe there was a craft called "Honey Bunny" and it made me grin like a little girl when I saw it.  Here is the link on how to make it:  Honey Bunny Bookmark

I hope she likes it!  Here it is done:


Here is the template I printed on pink card stock:


And here are some of the supplies I used, chenille pipe cleaners, craft glue, also used scissors and contact paper to laminate the template:


Laminated the template with contact paper, cut it out and then cut out the face area:


Wrapped the top of the bookmark in the pipe cleaners:


Printed a picture of my face and glued it on the circle I originally cut out and glued into the hole:


Here is the back, I looped some pipe cleaners and glued them onto the back of my picture:


Wednesday, April 27, 2011

Day 81

I do believe I am suffering from crafter's block, or something like that.  Work has been keeping me so busy and I'm thinking that has something to do with it!  The nerve of them, don't they know they need to back off!  :)  Ah well...

I decided to go with another card today, just an everyday, all occasion card.  We have these three little wire rings, that honestly I can't remember where they came from, but I know Stan said to keep them because I might be able to use them in a craft.  I'm glad he had me save them. 

I took the three wire rings, some extra decorative scrapbook paper and pink card stock to make the card.  I used some decorative scissors to cut the scrapbook paper, to give it a cute "different" look and glued that onto the card stock, then glued the wire rings over the scrapbook paper.  I really like the way it looks!

Here is the finished card:


Here are the supplies:


And again, the finished card, you can see the white glue holding the wire rings, but that will dry clear:

Tuesday, April 26, 2011

Day 80

My dad's birthday is next week and I of course wanted to make him a card, so I did that tonight, and even though I'm pretty sure he's not visiting this blog, I don't want to give away any surprises, so I'm only going to give a sneak peak tonight and after his birthday (May 6th) I'll come back and repost this with better pictures!

Until then....

Monday, April 25, 2011

Day 79

Today's craft had a bit of planning involved.  I've made these little drawstring bags in the past and I'm becoming an old pro at hand stitching them, but they are a bit time consuming.  They are very handy though, and well worth the time put into them.  I cut out the material yesterday and started the stitching, then brought it to work today and worked on it during my lunch break, then finished it tonight when I got home.  I didn't think to take pictures of the material I used, and because I did a bunch of the stitching at work I didn't bother with a "during" picture, so all I have are after photos!  My hand stitching is messy, but it's all pretty well hidden, accept where the string comes out, but overall it came out good.  They get better each time I do them!

I love the magician material, it's so cute.  Inside I just used a silky plain black material.

Drawstring bag done:


Close up of material and drawstring at top, you can sort of see my (bad) stitching:


Here is the top folded over so you can see my stitching better:


And now the inside, really bad stitching!  hehe:

Sunday, April 24, 2011

Day 78

I decided to give knitting another try today.  Because it has been so long I had to revisit the DVD "The Complete Beginner's Guide to Knitting".  This time I changed the yarn I was using to a beautiful but frizzy blue yarn.  I love the yarn, but because it's frizzy while doing the knitting I kept catching the little fly a ways and had to keep starting over.  After an hour of trial and error, I got through the first part of the DVD, up until the end of the knit stitch and she tells me that I'm now ready to do a Garter Stitch Scarf!  I agree and pull out my practice knitting and start on the scarf.

I had to cast on 26 stitches for the large scarf and then just do knit stitches until I have 24".  After that I have no idea!  Okay, well I know I'm supposed to bind off and weave the ends.  Well I haven't got to those parts of the DVD so once I have a 24" long scarf, I"ll watch those two chapters and hope I can figure out what needs to be done.  I worked on this knitting for a few hours, stopping for breaks and to get ready for work tomorrow, so I didn't get too much done, just about 7".  But I really enjoyed working on it, and I would still be working on it if I didn't need to post this and then finish getting ready for tomorrow.  Knitting is really fun, who knew!  I'm really proud of myself though, I can't wait until I can make something bigger.  I have directions for a prayer shawl so I think once I"m more comfortable I'll make that!

Here is what I have done so far:


Here is a close up of the work:


And here is Karma trying to walk off with the "working" string:

Saturday, April 23, 2011

Day 77

I decided on a simple craft today and revised the Origami Stationery.  I chose a project that actually incorporates two different origami folds.  The finished origami is called a "Pillow Note", but it incorporates another origami called "Ship Mates".

First I folded the Pillow Note, which is pretty simple, just a few folds here and there.  Then I went and folded the two pages that make the Ship Mate origami.  You put the Ship Mate origami inside the Pillow Note, finish folding and the Ship Mate sits inside the Pillow Note, with the edges "fluffy" like a pillow.  It's pretty neat actually...

Here it is finished:


Here is the paper I used for the Pillow Note:


The folds needed to make the finished note:


Here is the paper used for the first half of the Ship Mate note:


Finished folds for the first half of the Ship Mate note:


The paper chose for the second half of the Ship Mate note:


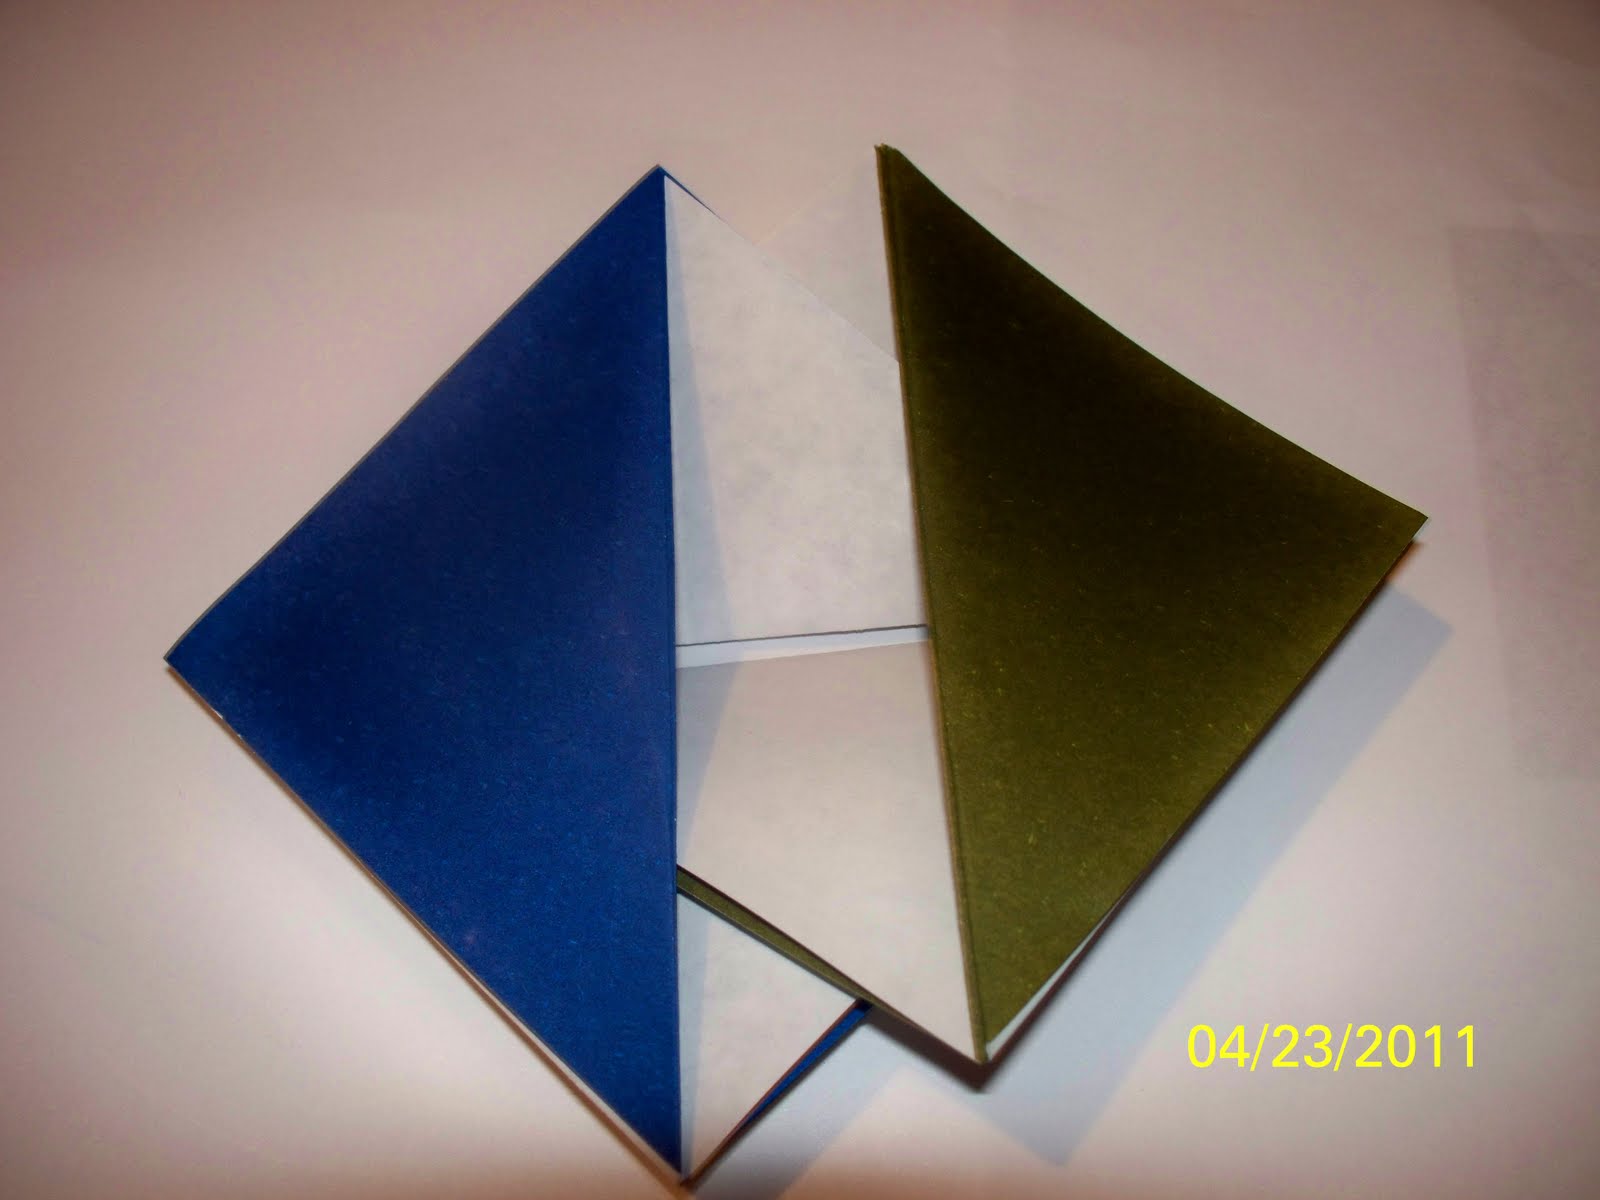
Take the two half's and join them:


Joined and finished Ship Mate note:


Put the Ship Mate inside the Pillow Note and tuck the corners of the Paper Note and tuck them into the folds of the Ship Mate:


All tucked and "fluffy" like a pillow!:

Friday, April 22, 2011

Day 76

I have been thinking a lot lately about the goals I have, the things I want to accomplish and I decided to make a "dream board" or an "inspiration board" to keep me grounded and to remind me what I want to accomplish.

I had a piece of cardboard at work that was approximately 9" x 9" and decided that was a good size to do the board.  I went online and found photos of things that represent the dreams or goals that I have.  They are: a Tudor style home (my dream home), a Honda Element (my dream car), a woman celebrating getting out of debt (my goal), a jar of "savings" (my goal, to save money),  a baby's foot (my dream to have children), a photo of
aurora borealis/northern lights over Alaska (one of my dream trips) and a castle in Ireland (my other dream trip).  I printed and cut these pictures out and arranged them how I wanted.  I went back and glued a light purple card stock over the cardboard, then glued the pictures on the card stock.  I then went through a few magazines to find some wording and glued those on.  For the words I couldn't find in the magazine I used my rubber stamp letters.  Lastly, I trimmed the cardboard frame in dragonfly ribbon to just give it a more finished look.  Once the glue dries, I'll trim the ribbon on the edges and hang it up where I can be reminded of what my goals and dreams are in case I forget!

Board all finished:


Here is the cardboard and pictures cut out, getting ready to arrange it all:


Glued the purple card stock on the cardboard:


After everything was glued, another finished photo:

Thursday, April 21, 2011

Day 75

I was flipping through my book "365: Make Something Everyday and Change Your Life", the book that got me started on this journey.  I was looking for some inspiration and I found it on day 217 - "Create a flip-book animation in the corner of a notebook or book."  So that is exactly what I did!

I remember doing these simple flip books in school years ago, so I just went with a simple stick figure cat or dog, or deer, or whatever...use your imagination...and drew one on the corner of each notebook page (small so I can reuse this notebook for other things in the future) in pencil.  On each page, alternating, I did one with the legs out and one with the legs in.  And for an added bonus, I had Stan help me record it on the camera so we have a movie today!  After the craft video, be sure to watch the second video below of Cody molesting me while I was trying to record the craft!

Grab some popcorn and tune in:


And now here is Cody (if you turn your sound on you can hear him purring like a crazy kitty):


Wednesday, April 20, 2011

Day 74

I found this site today called Craftbits and they had some adorable craft ideas.  This was one of them.  It's called a "Index Card Note Deck".  I did it a tiny bit different then the directions, but not too far off.

I used a stack of index cards I had on hand, my label punch, a piece of decorated scrap book paper, two pieces of card stock, some ribbon, hole punch and a glue stick.  I punched out a handful of labels from the index cards, one from the scrap book paper and one each from the card stock colors.  I glued the scrap book paper to one of the regular labels to get the cover and used the others as dividers and the back cover.  After everything was cut, glued and hole punched I strung them onto the ribbon and knotted the top.  It came out really good, and will be used for all types of notes in the future!

Here is the Index Card Note Deck all done!


Here are some of the supplies I used, though I ended up not using this ribbon:


Here are the index cards, card stock and scrap book paper cut out in the label shape:


Another shot of the finished note deck, next to scissors so you can gauge the size:

Tuesday, April 19, 2011

Day 73

I did today's craft at work today because I knew I would want to come home and relax.  I found this cute dragon online and decided to draw him.  I messed up his eyes though, and tried to erase them, and I couldn't get it to disappear enough so I used white out...so now I have two white out marks instead of erased eyes, but hey, you gotta do what you gotta do! 

Isn't he cute, I named him Dennis, Dennis the Dragon...because I can! 

With flash:


Without flash:

Monday, April 18, 2011

Day 72

I love applesauce!  And Stop & Shop has a delicious unsweetened applesauce that I buy in those huge jars.  And I go through one a week.  I was starting to feel bad about throwing out that huge jar every week (though we do recycle) so this last one I decided to keep and use again.  I have tons of buttons and decided that this would be a perfect container to hold them, once it got a makeover of course.

I pulled out some red and black ribbon, some craft glue and Cody (because apparently I can't craft without him) and got to work.  Once the glue dries I'll go back and secure the ribbons a bit more, but for now, this is how it looks, oh and I painted the lid black, but that needs to dry too:


Here is the jar and ribbon before I got started:


With the red ribbon attached (and Cody at the top right supervising):


And now the black ribbon:

Sunday, April 17, 2011

Day 71

Today was a busy Sunday with chores, running out for groceries and getting ready for work tomorrow so when I sat down I wanted to do something relaxing and decided it was a good day to draw. It's usually a pretty relaxing thing for me to do, and today was no different, except for a certain kitty named Shitten (or Buttons if you are under the age of 16) who decided it would be a GREAAATTTT time to get some love (photographic evidence below).  Because of this the picture didn't turn out as nice as I would have liked, but Shitten was thrilled with all the love she received, so it wasn't too bad overall.

Here is the picture completed (click on pictures to make them bigger):


Here was my inspiration pictures, one of my favorite books and one of my favorite book covers:


Close up of the girl:


Another close up:


Here comes Shitten looking for her love, I enjoyed how she just flopped down on my arm while I was drawing:


And when I finished she decided to sit on it while I was trying to take pictures, that was her way of saying she didn't like it I think: