Showing posts with label card. Show all posts

Friday, April 29, 2011

Day 83

I have this really pretty peacock themed scrapbook and card stock paper that I wanted to use tonight but wasn't really sure how to.  I decided a mosaic style card might be a nice way to showcase the different papers.  I was trying to be precise about my cuts and then realized I wasn't getting anywhere trying to figure out measurements, so I just went for a haphazard approach, which when your crafting seems like a fantastic idea!

I picked a pretty blue card stock for the actual card, I then picked three different peacock themed card stock to go with it.  I cut each peacock paper into three strips and then each strip into squares.  I then applied each square to the blue card stock in a varied pattern.  It was really hard to photograph this when I was done because the paper is very shiny.  But here is what I came up with:

Done card:


Here are the  papers I used after I cut the peacock paper into strips:


Here is a close up of the finished card, trying to get a bit more detail:

Wednesday, April 27, 2011

Day 81

I do believe I am suffering from crafter's block, or something like that.  Work has been keeping me so busy and I'm thinking that has something to do with it!  The nerve of them, don't they know they need to back off!  :)  Ah well...

I decided to go with another card today, just an everyday, all occasion card.  We have these three little wire rings, that honestly I can't remember where they came from, but I know Stan said to keep them because I might be able to use them in a craft.  I'm glad he had me save them. 

I took the three wire rings, some extra decorative scrapbook paper and pink card stock to make the card.  I used some decorative scissors to cut the scrapbook paper, to give it a cute "different" look and glued that onto the card stock, then glued the wire rings over the scrapbook paper.  I really like the way it looks!

Here is the finished card:


Here are the supplies:


And again, the finished card, you can see the white glue holding the wire rings, but that will dry clear:

Tuesday, April 26, 2011

Day 80

My dad's birthday is next week and I of course wanted to make him a card, so I did that tonight, and even though I'm pretty sure he's not visiting this blog, I don't want to give away any surprises, so I'm only going to give a sneak peak tonight and after his birthday (May 6th) I'll come back and repost this with better pictures!

Until then....

Saturday, April 16, 2011

Day 70

I started a few crafts today and couldn't get them to work out!  So I finally did this card and it came out good, and I must say better then the other two!  I have a stencil with different Chinese characters on it, so I traced on in pencil onto pink card stock, the one for "love".  I then used blue acrylic paint to paint the stencil.  In the pictures the outline looks white, but it's actually the pencil marks that the flash from the camera picked up.

Here is the finished card open:


Finished card closed:

Thursday, April 7, 2011

Day 61

Today's craft is another "any occasion" card.  I'm calling this one "Sunburst"!  I traced a picture of a sun rising over the mountains in pencil and then again with a embossing ink pen.  I used red embossing powder and then colored in the other areas with some markers.  I cut it out and put it on a 3D dot and threw (alright maybe placed...) it on a yellow card and then I went wild and crazy and tried to do some freehand drawing of flames to match the sun....yeah, didn't come out to well.  But overall still a very nice card!


Wednesday, April 6, 2011

Day 60

I have this book called "Fabulous Folds For Card Making" and in it is a variation of this card.  Pretty much the same, except the size is a bit different and I used different paper and embellishments then what the book suggested.  This card is good for really any "female" whether friend or family.  It would be good for a birthday, Mother's Day, or just because! 

First I cut down a piece of card stock and drew in an angle about an inch and cut that off:


I took a piece of scrapbook paper and used it for the front of the purse:


After some more cutting and folding, I added a band of yellow card stock on the top fold of the purse with some designs punched out so the purple would show through.  I then added two pink fasteners with some ribbon for the handle:


Here it is all done!:


And inside, tons of room to write lots of lovely things:

Monday, March 7, 2011

Day 30

I have an issue of sorts with today's craft.  It's a card, but it's a card for someone who might see it on this blog and I don't want to ruin the surprise.  What I'm going to do is show a teaser, and once they receive it, which will be in a few days, I will update this post with the "real" pictures.  Sorry to be all secretive, but I don't want to ruin the surprise!

I must say though, my card skills are getting better!!

UPDATE 3/13/11 - Beth got her baby shower card so I can show it here now!!!  CONGRATULATIONS BETH!!!

Saturday, February 26, 2011

Day 21

Since I'm still not feeling very well I didn't want to do a craft that involved pulling out all my craft supplies and making a mess that I would then have to clean up, 

I decided on a card, I guess this would be considered an "any occasion" one since it really doesn't have a theme.  I had some left over orange card stock cut in the perfect size so I grabbed that and I have a huge supply of old magazine laying around so I decided on a collage format.  I cut out a page full of color, in various sizes and then glued them on to the front, then I went back through the magazine and cut out words that were positive sounding, and glued them over the mosaic pictures.  Overall I think it looks fun and funky, just like me!  LOL


Tuesday, February 15, 2011

Day 10

The other day I was looking online for card ideas and came across a charity website called Make A Child Smile (http://www.makeachildsmile.org/).  The site lists kids who are have various illnesses, tells their stories and gives you the opportunity to mail them a card, to make them smile.  I thought it was a great idea, so today's craft is a card for one of the kids on the site, a 3 year old named Nathan. 

The outside is a 3D sticker of Cookie Monster (it's fuzzy too!) with some 3D cookies!  Really adorable.  The inside, I wanted to put a joke but the only one I came up with was "Why did the cookie go to the doctor?"  "Because it was feeling crummy!".  It's really the only cookie joke I could find online, but I was sort of hesitant to put it in the card, as it's going to a "sick" child!  But after some thinking, I thought it would be okay, as it's a card about cookies and Cookie Monster!  I really hope I don't offend with the joke, but again, I feel safe sending it.  I did the joke on a little flap, so you have to lift the question to get the answer.  And put cookies around it, with a personal note at the bottom.  I hope it makes him smile. 


Thursday, February 10, 2011

Day 5

Hallmark watch out!  Okay, well maybe not.  I did have other ideas, but I realized that they would take more then a day to finish.  Since I only have an hour or two when I get home at night, I think my options are going to be limited.  Maybe once I get into a better routine, I'll be able to whip out more advanced projects.  In the meantime, here is another card.  This one will go in the "when needed" box for now, so I didn't designate it an occasion. 

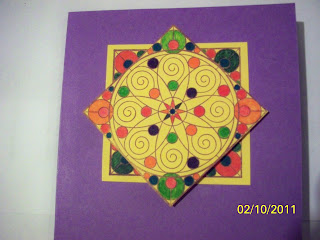
The design is a stamp that I inked and stamped two different times on yellow paper.  I cut both designs out and colored them in, and then used a 3D pop dot to stack the designs to get the popped effect.  I like it lots!  Once I find a use for the card, I'll add words and maybe some other decorations, but for now, it's perfect! 


Sunday, February 6, 2011

Day 1

Perhaps I'm crazy. We are in the midst of DIY'ing our wedding for September. But I'm always one to find an excuse to craft, and always in need of a push, some sort of starting point, so when I came across the book "365: A Daily Creativity Journal" by Noah Scalin, I realized this was a fun way to spend the next year, and I can incorporate the crafting for the wedding into this project. Also, when the wedding has come and gone, I was worried that I would have some type of DIY withdrawl, so this is a way for me to keep going, once the wedding madness is over!

One of the things I decided was that for 2011 I would buy no more cards! I'm sick of giving money to Hallmark when I have the means to make my own. Granted my cards will in no way be as wonderful as Hallmarks, but I can guarantee mine will have more love in it's little card soul then any I have ever purchased! So for my Day 1 craft I decided to make my friend's birthday card.

When I saw the little butterflies in all their glitter glory, I just knew I had to use them, and I'm glad I did. The inside has a quote about friendship and a "Happy Birthday" chipboard sticker, and overall for my first card, I'm happy with it. Hopefully with every card I do, they will get a bit more better, but this was a good start.